Windows 10 DNS Setup Guide

Watch this video tutorial to learn how to deploy SafeDNS on a Windows-based PC with static IP without the installation of any software
Or read this step-by-step guide:
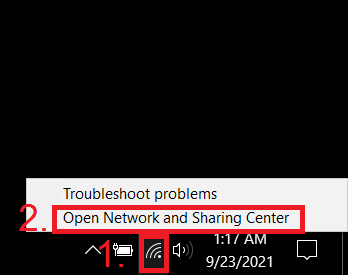
1. From the Taskbar pane, right-click on the Wi-Fi (or LAN) icon and select Open Network and Sharing Center:
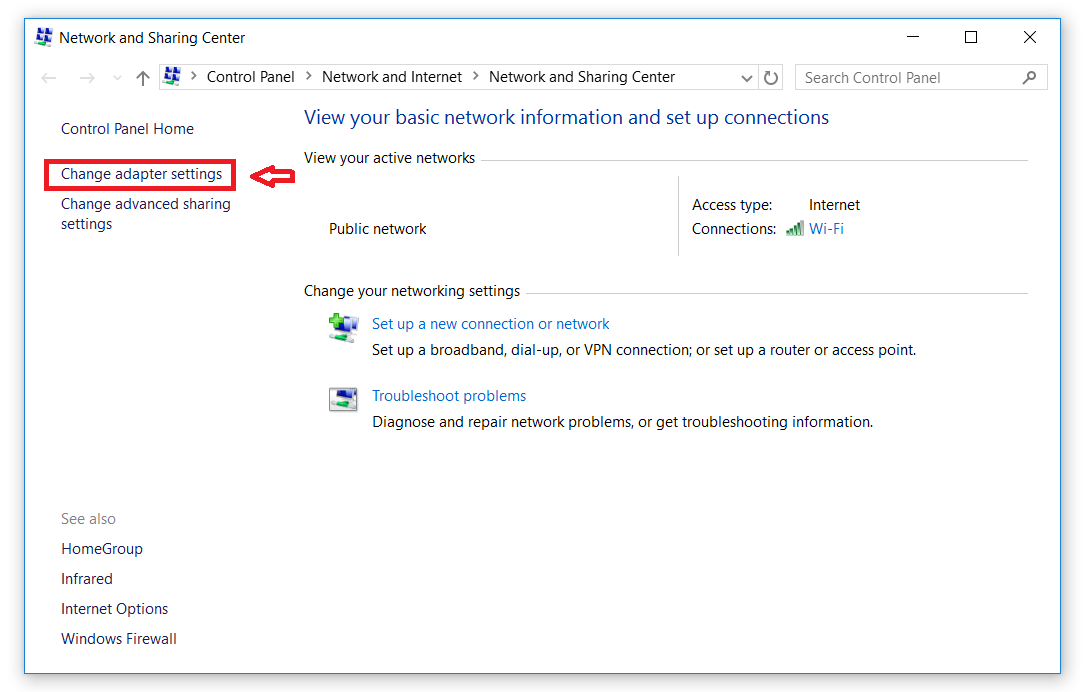
2. Select Change adapter settings.
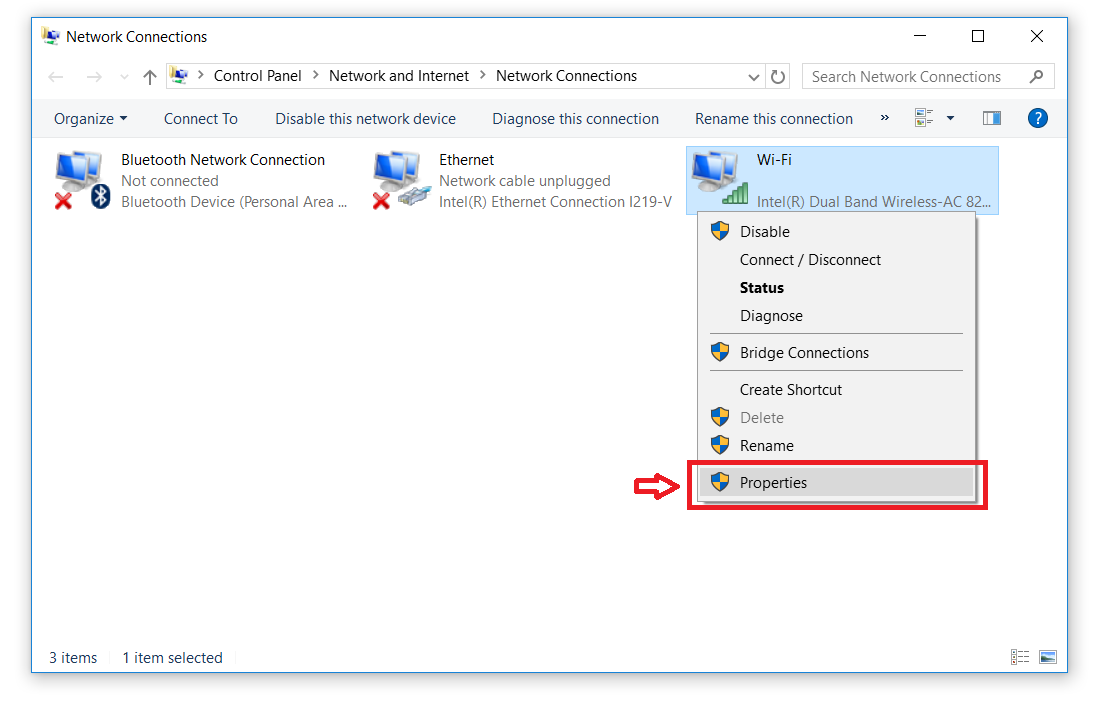
3. Right-click on the current internet connection, and select Properties. If the system shows the security notification, click Yes.
4. We recommend disabling Internet Protocol Version 6. This will simplify the installation process and will have no effect on the quality of your internet connection. After that, select Internet Protocol Version 4, and click on Properties.
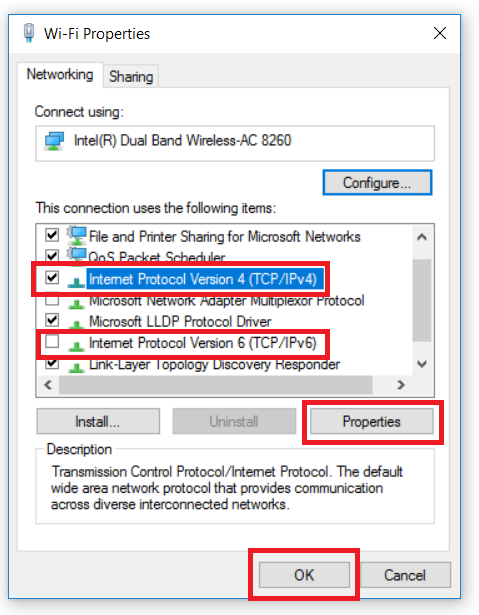
5. Select the option Use the following DNS server addresses, enter the following SafeDNS addresses:
Preferred DNS server: 195.46.39.39
Alternate DNS server: 195.46.39.40
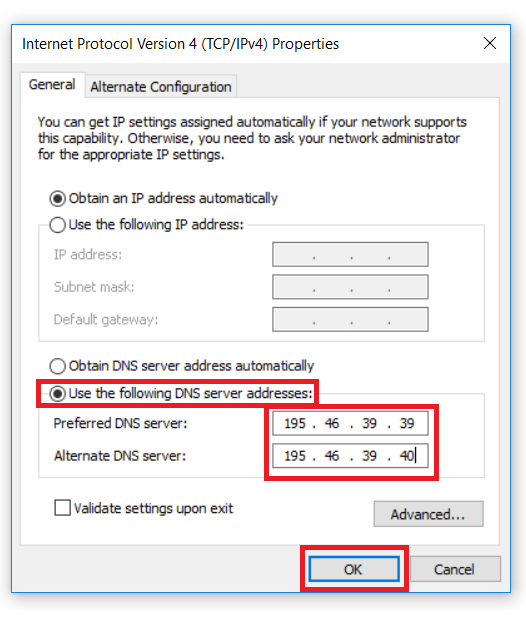
6. Click the OK button to save your settings, and Close the network properties window.
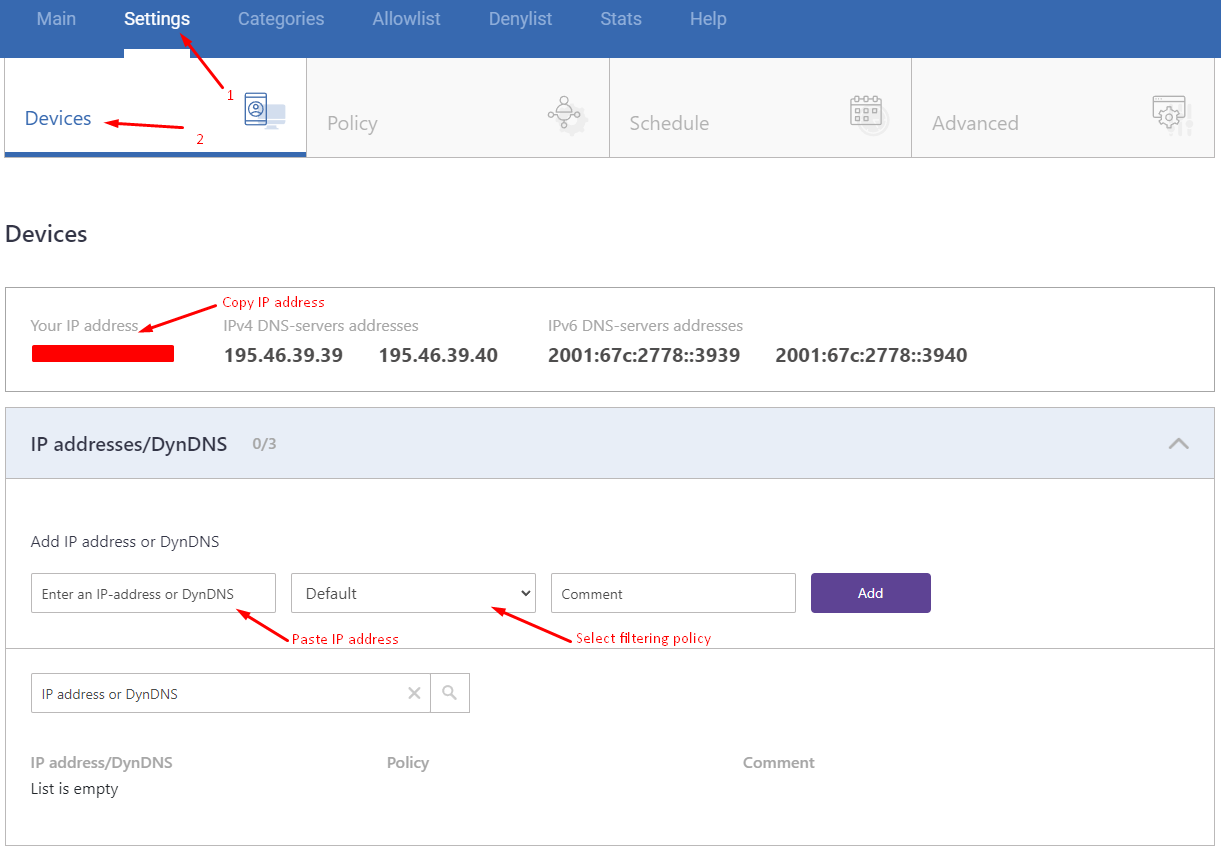
7. Navigate to the SafeDNS Dashboard > Settings and copy your IP address in the "Enter an IP-address or DynDNS" box. Click "Add".
You have successfully configured the SafeDNS for Windows 10.
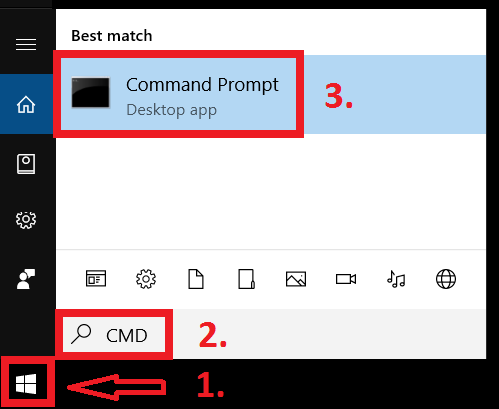
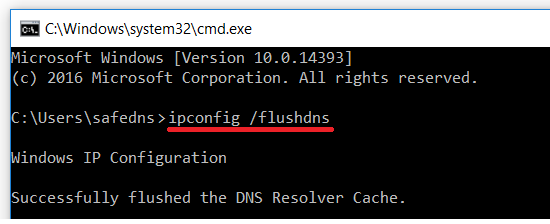
Please note that Windows may still be using the addresses saved in the local DNS cache. It is recommended to clean it using the following steps:
1. Press "Start"
2. Search for "cmd" and open the suggested application
3. Enter and run the following command in the opened window ipconfig /flushdns
Learn more about how to clear DNS cache.
!Please note that settings take 5-7 minutes to apply.
!Stats and filtering status update hourly.
Take advantage of the SafeDNS trial period and try all the best features