SafeDNS App for Android Setup Guide

SafeDNS Agent is an application that allows you to use SafeDNS filtering on mobile devices running Android.
Supported Android versions: 5 or higher.
Supported devices: Samsung, Pixel, Lenovo

Alternative .apk installation file download: https://safedns.com/downloads/safedns-2_1_6_3-debug.apk
Getting started
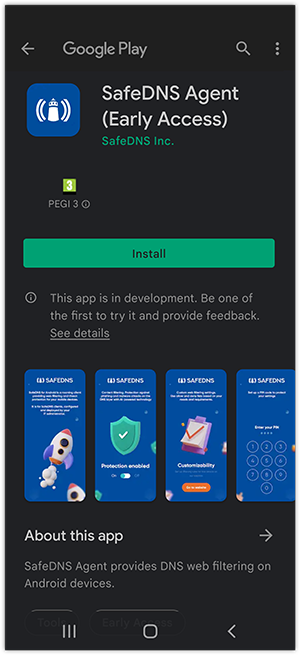
1. Install the app from Google Play, and run the SafeDNS Agent app.
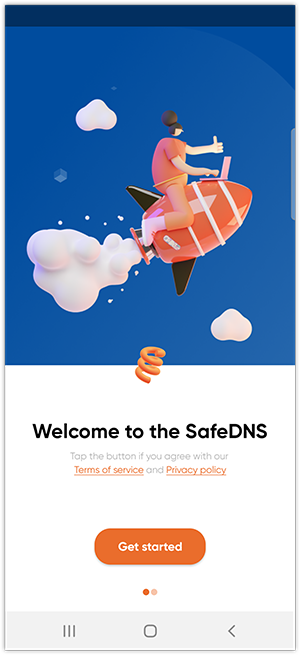
2. Press the "Get started" button.
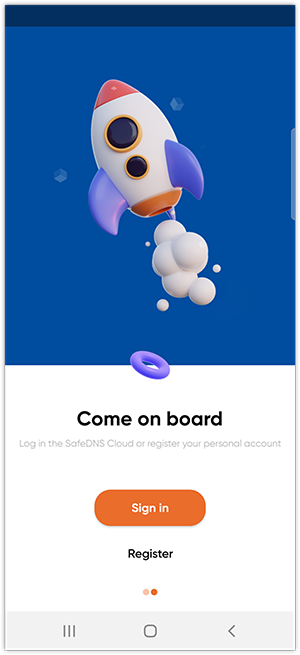
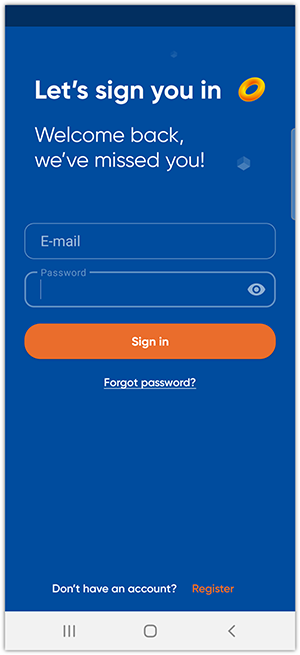
3. Press "Sign in" if you already have a SafeDNS account, and go to Step 5.
Otherwise, press "Register".
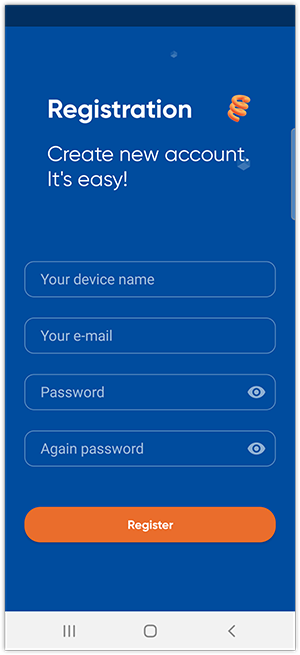
4. Fill in the required fields and press "Register".
5. Enter your SafeDNS account email (or username) and password, and press "Sign in".
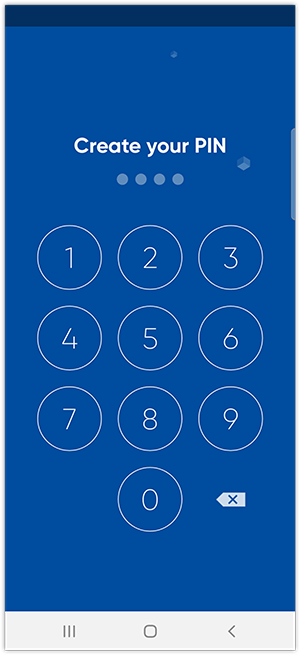
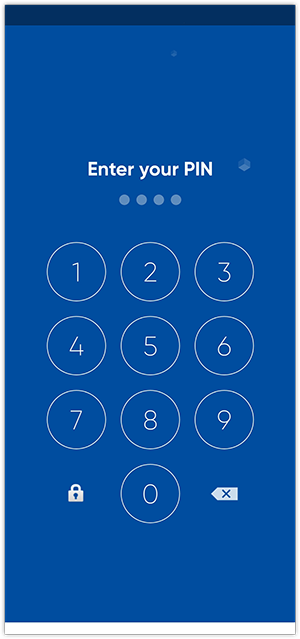
6. Create and confirm a PIN code for quick access to the application.
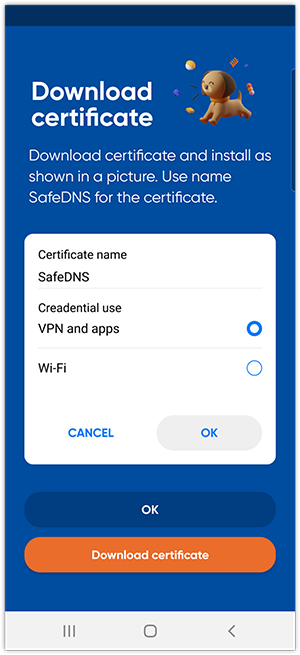
7. Press "Download certificate" to install the SafeDNS root certificate. This step is necessary for the correct display of the block page on HTTPS sites.
Please note that the filtering still works without the installed certificate.
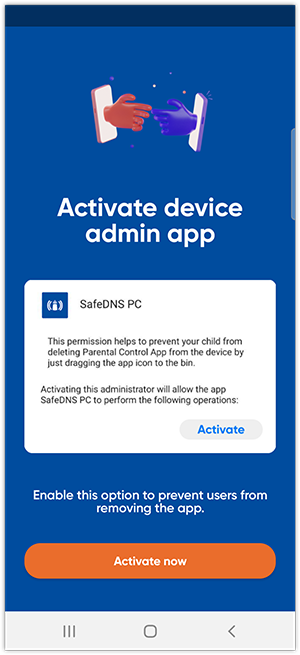
8. Press "Activate now" and "Activate device admin" to enable the feature that prevents unauthorized users from deleting the application and disabling filtering on the device.

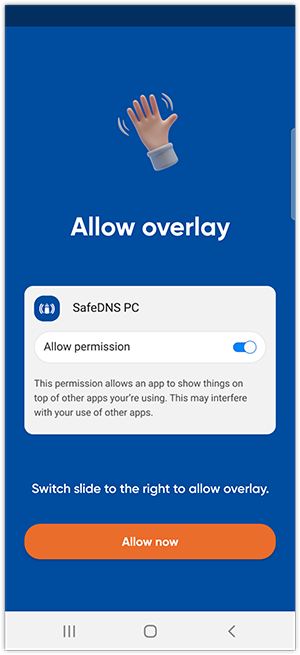
9. Press "Allow now", then find the SafeDNS app in the suggested list and set the permission switch to ON.
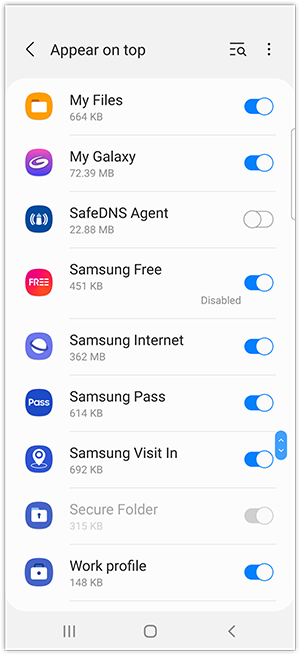
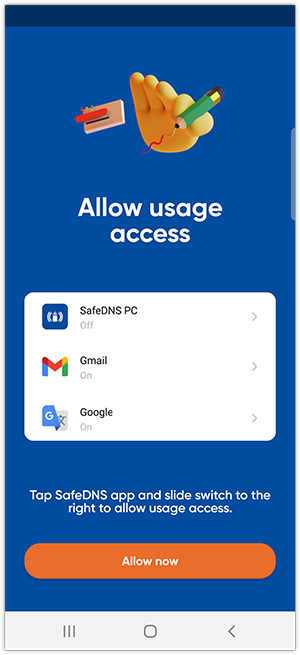
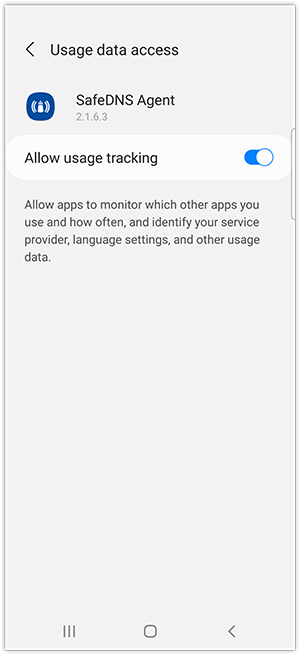
10. Press "Allow now", then find the SafeDNS app in the suggested list and set the permission switch to ON.
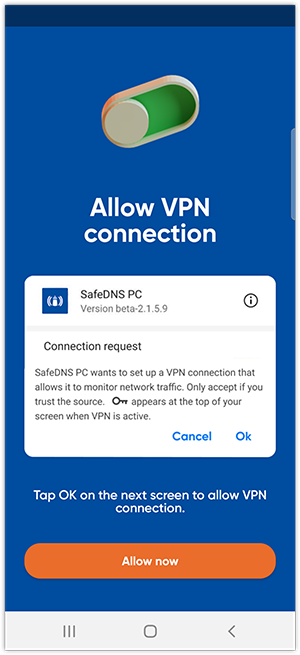
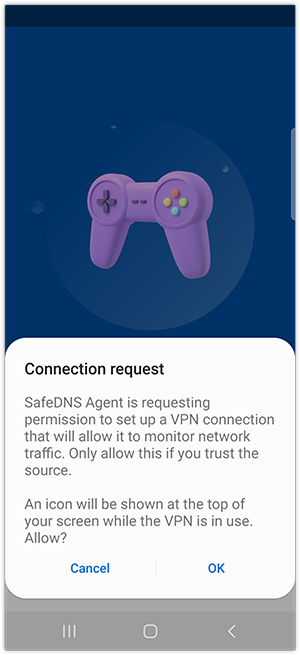
11. Press "Allow now", then tap "Ok" to allow SafeDNS Agent to create a VPN connection.
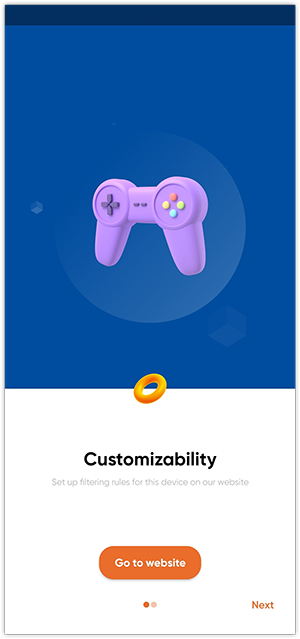
12. Press "Go to website" to visit the SafeDNS Dashboard and set up the filtering.
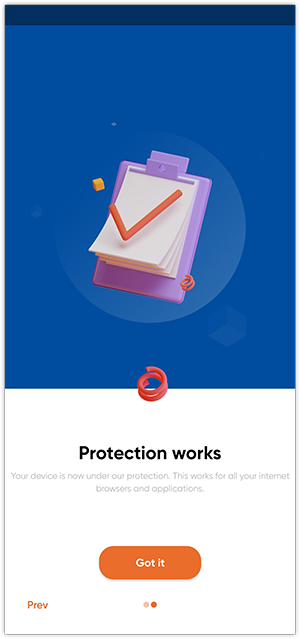
If the filtering is already configured, swipe this screen to the left and press "Got it" to complete the installation.
App settings
If you want to change the filtering settings after installing the application, open the SafeDNS Agent application and enter your PIN code.
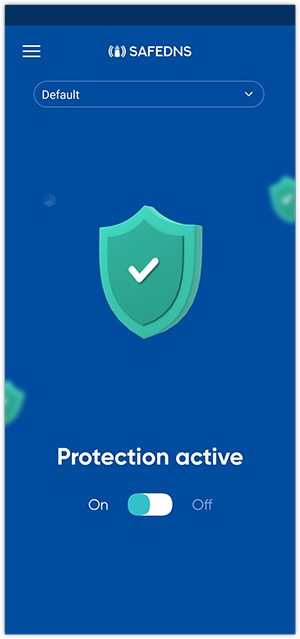
You will be taken to the main screen of the application. Here you can disable filtering using the slider, change the filtering policy (after installation, the Default policy is applied), or go to the SafeDNS Dashboard. To go to the Dashboard, press on the three bars in the upper left corner and pick "Filtering settings".
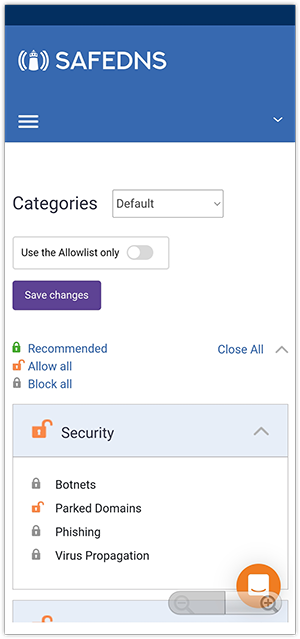
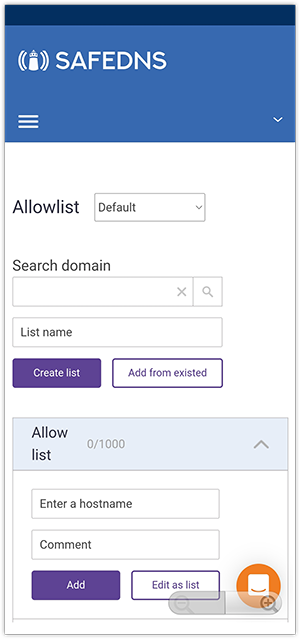
In your Dashboard, you can configure filtering categories, manage exceptions in Allow/Deny lists, and much more.
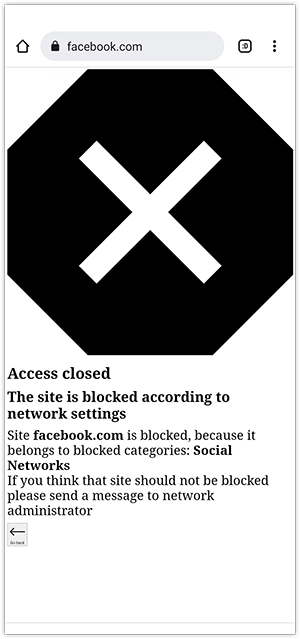
After setting up the filtering, check its operation by trying to access one of the sites you blocked. If you see the block page instead of the site, everything is configured correctly.
!Please note that settings take 5-7 minutes to apply.
!Stats and filtering status update hourly.
Take advantage of the SafeDNS trial period and try all the best features