SafeDNS Agent for Windows Setup Guide

Video tutorial #1: SafeDNS Agent Installation
Video tutorial #2: SafeDNS Agent Settings and Features
What is Agent created for
The Agent software is designed to automatically launch and manage the SafeDNS web filtering service on Windows-based computers. The Agent should be installed on the PC when you have a private (local) or a dynamic public address, or you want to have a separate web filtering policy for each Windows-based computer within your network.
Attention! If you want to configure the SafeDNS web filtering service for the entire network, you can find information about the available settings in the Instructions section of our website.
Agent Installation
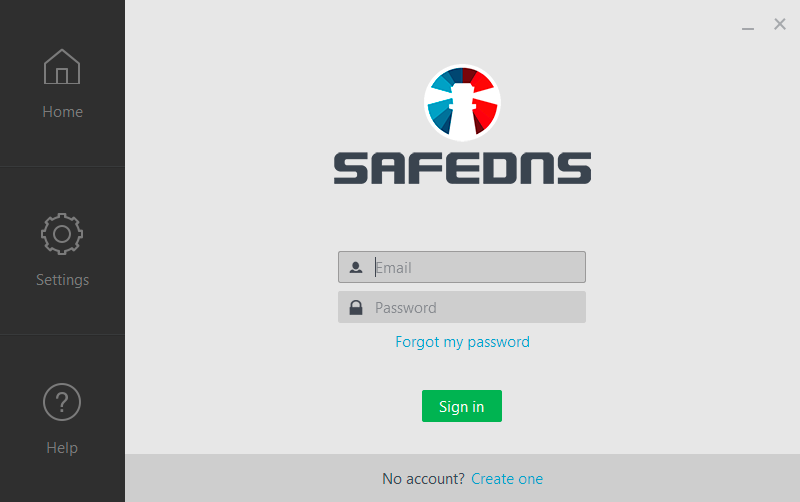
1. Log into your SafeDNS account using your email/login and password.
If you have already downloaded the Agent, skip to Step 3.
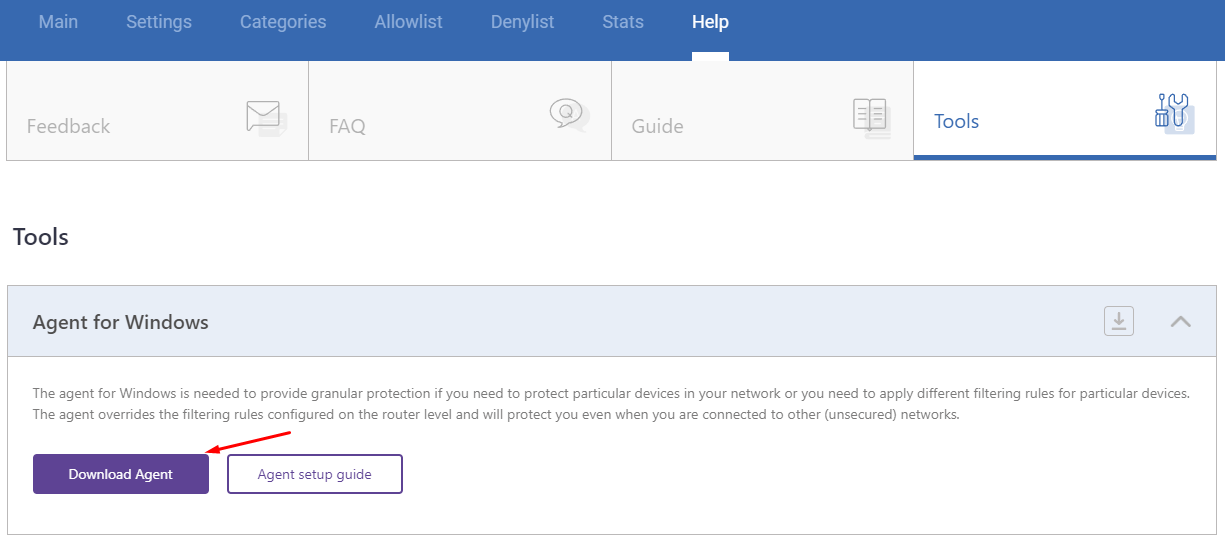
2. Navigate to Help > Tools and click on the "Download Agent" button under "Agent for Windows".
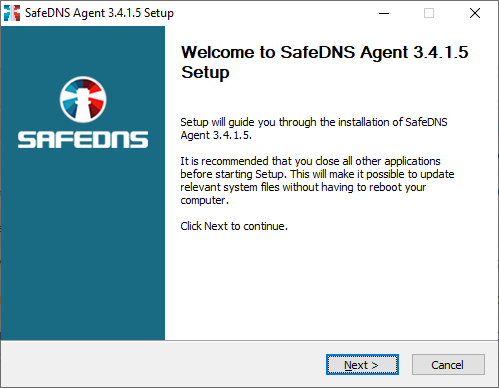
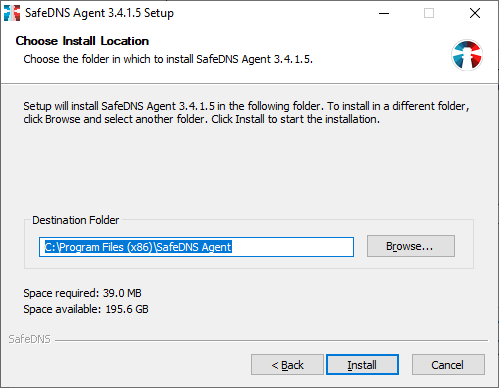
3. Make sure your current Windows user account has Administrator rights. Run the SafeDNS-Agent-Setup.exe file and install the Agent on your computer following the program prompts.
If you see a Windows SmartScreen alert, click More options > Run anyway to start the installation.
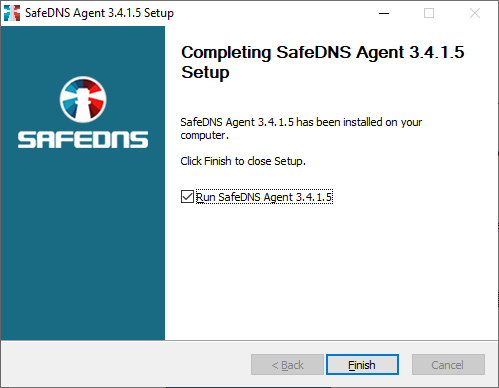
After the successful installation, the Agent will be launched automatically.
Agent Unattended Installation
You can install the Agent in an unattended automatic way. This allows you to automatically install and launch the service, manage the filtering policies and collect web traffic statistics on several individual computers within your network. Learn how to install the Agent in unattended mode.
Getting Started with Agent
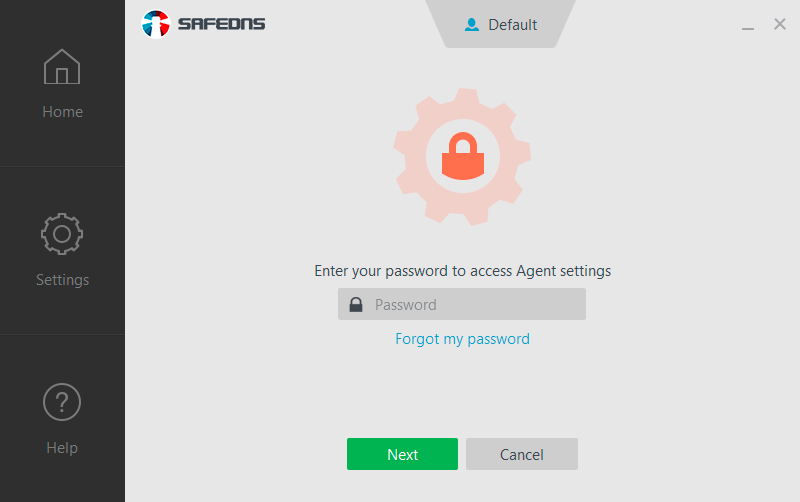
Log in to the Agent using your SafeDNS email/login and password.
If you forgot your password, click "Forgot my password".
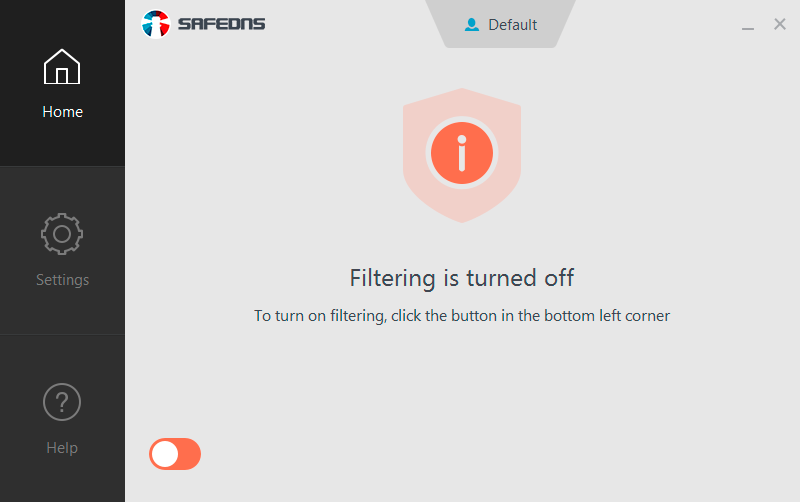
After successful login, the Home page of the program will be shown.
This page contains:
- Current status of the filtering service in the center.
- Active filtering policy at the top.
- On/Off filtering slider button at the bottom.
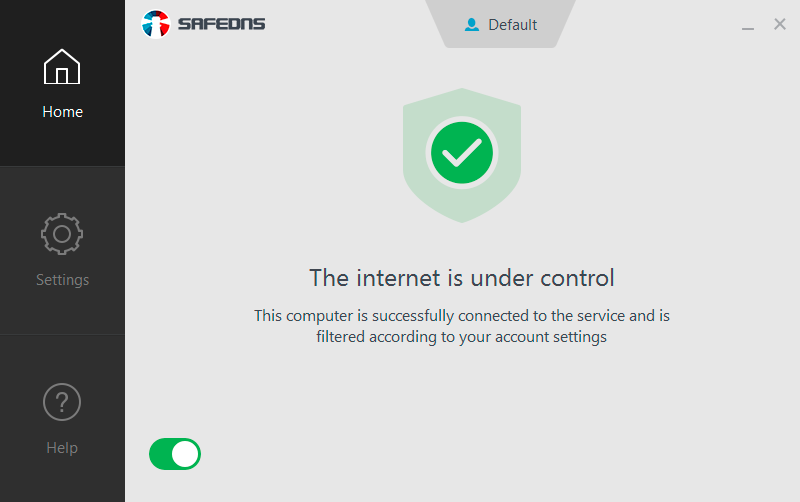
You can temporarily shut down the filtering by clicking on the slider button at the bottom of the window. You will be asked for a password if the settings are password protected.
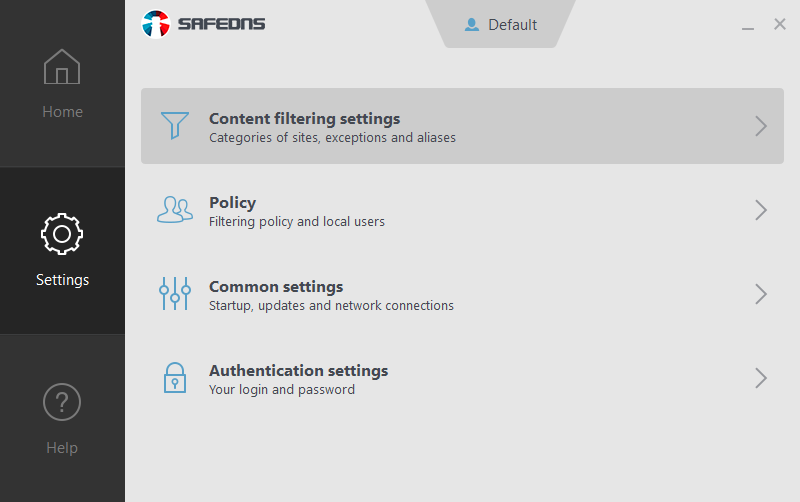
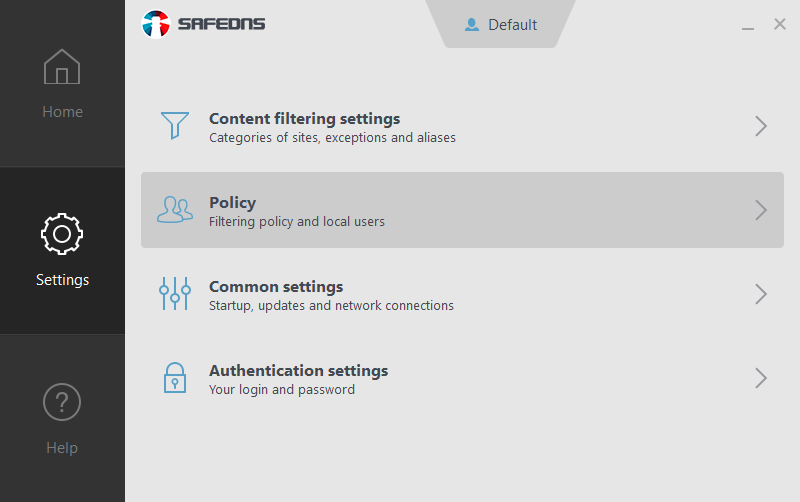
Content Filtering Settings
To set up your filtering rules go to the Content filtering settings section.
!Please note that settings take 5-7 minutes to apply.
In some cases, you will need to clear the cache of your browser.
If you have more than one filtering policy, you can select the needed one at the top of the window (paid plans only). Click on the Plus button to proceed to the Policy section where you can create a new policy.
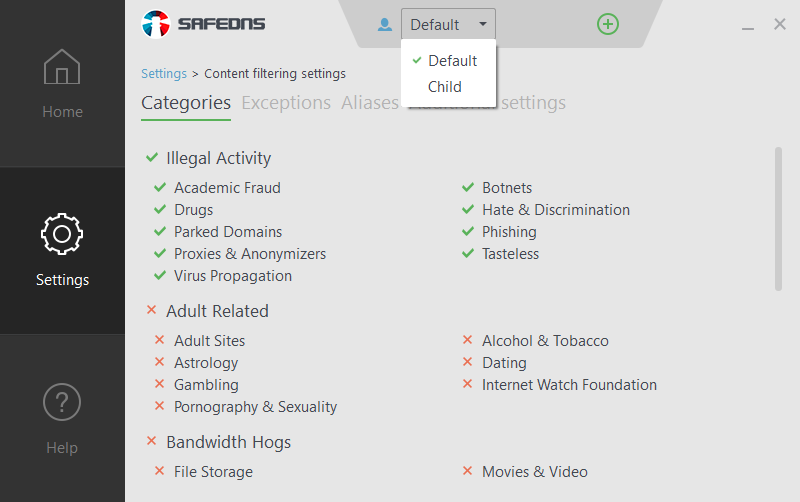
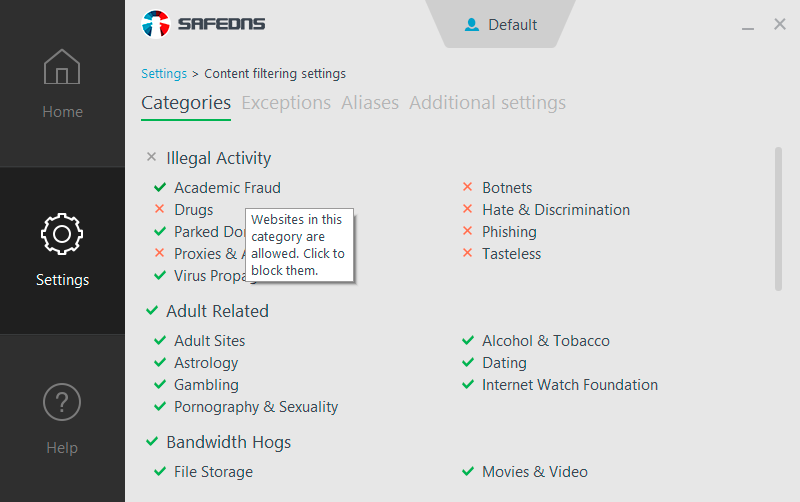
In the Categories tab, you can see a full list of content categories of your current filtering policy. In this tab, you can block or allow any of them. The red cross indicates blocked categories and the green checkmark indicates allowed categories. You can also block or allow an entire group of categories by clicking on the group name. The gray cross near a group name means that some categories are blocked and some of them are allowed.
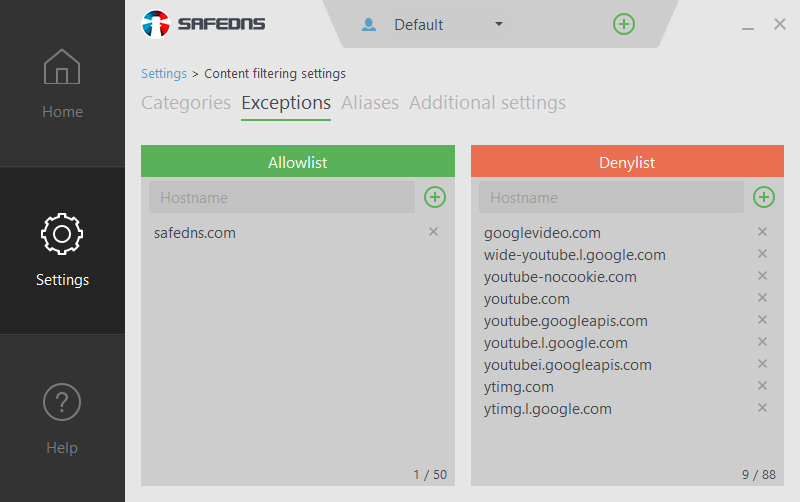
In the Exceptions tab, you can create Allow/Denylists for individual websites (domains). Domains in Denylist will always be blocked even if the category of these domains is allowed. Domains in Allowlist will always be accessible even if the category of these domains is blocked.
To block a group of subdomains, add the main domain (e.g. google.com) to the Denylist and all subdomains on this domain will be blocked (drive.google.com, translate.google.com, photos.google.com, etc).
You can also create Named Allow/Denylists and apply them to one or several different policies (this option is available in Dashboard only). Learn more about how to create named lists.
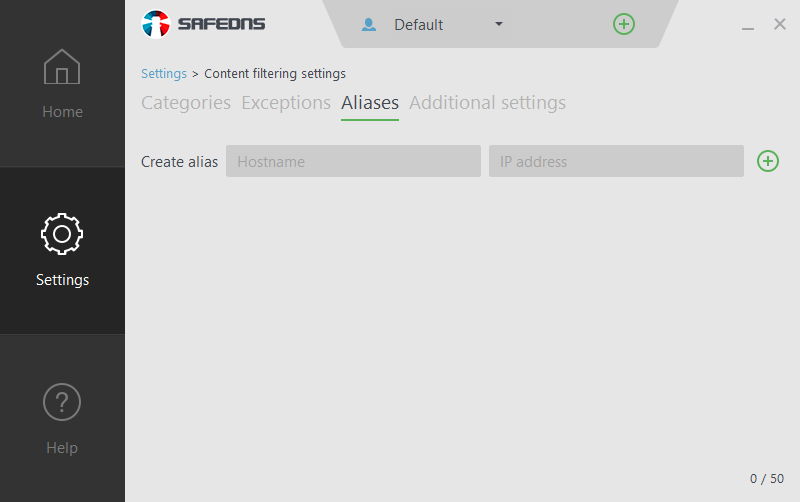
For the correct performance of your Internet Service Provider’s local resources such as media archives, online TV services, or your company’s local resources such as file share servers, printers, etc., add a local domain and IP address of this domain in the Aliases tab.
You can manage additional settings such as Force Safe Search, Force Restricted Mode for YouTube, and Use the Allowlist only in the Additional settings tab.
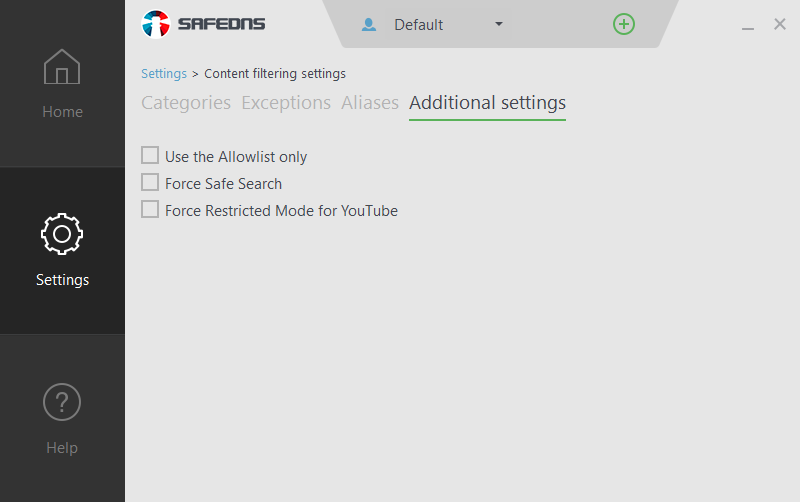
!All domains which are not added to the Allowlist will be blocked when Use the Allow List only option is active.
Creating Additional Filtering Policies
The Default filtering policy cannot be deleted.
You can also create additional policies (paid plans only) and use them to apply different filtering policies for:
- a different user accounts on the same PC,
- different PCs with the SafeDNS Agent installed.
To create a new filtering policy follow these steps:
1. Go to the Policy section on the Settings page.
2. Type the name of the new policy in the Create policy field. After that, click the Plus button on the right to create a policy.
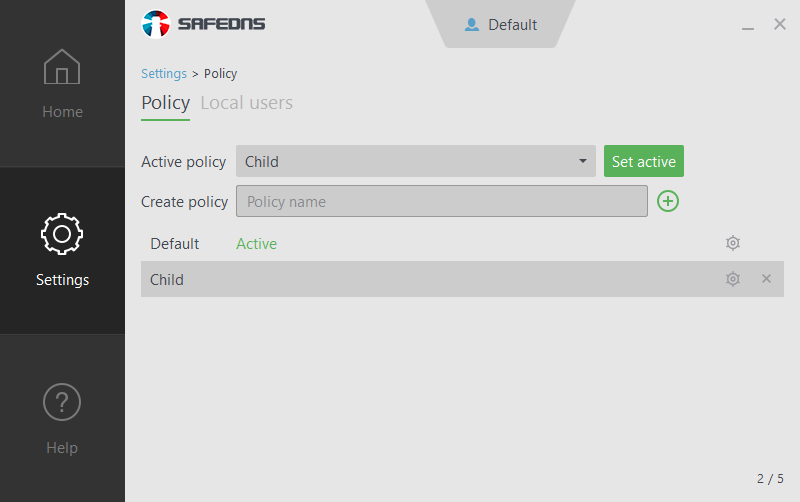
Now you can change settings for a new filtering policy in Settings > Content filtering. You can use the Cogwheel icon near the policy’s name, to open the Content filtering settings of this policy.
To delete a policy, press the Cross icon near the policy’s name.
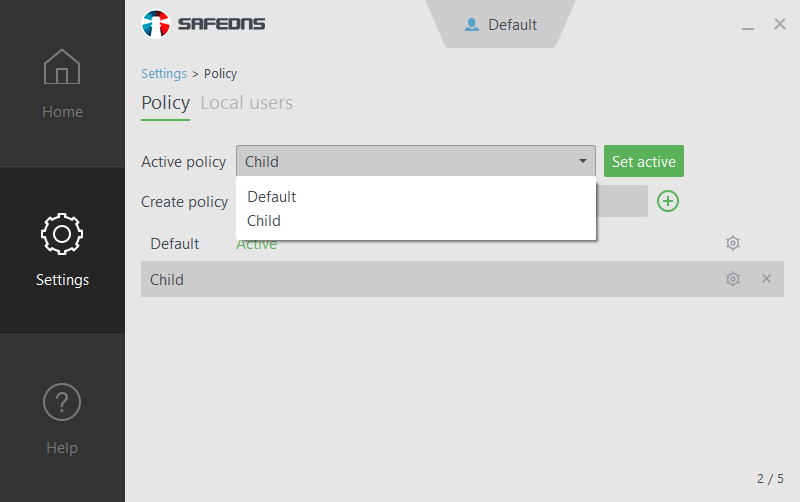
You can set up one of your policies as active in the Active policies dropdown menu.
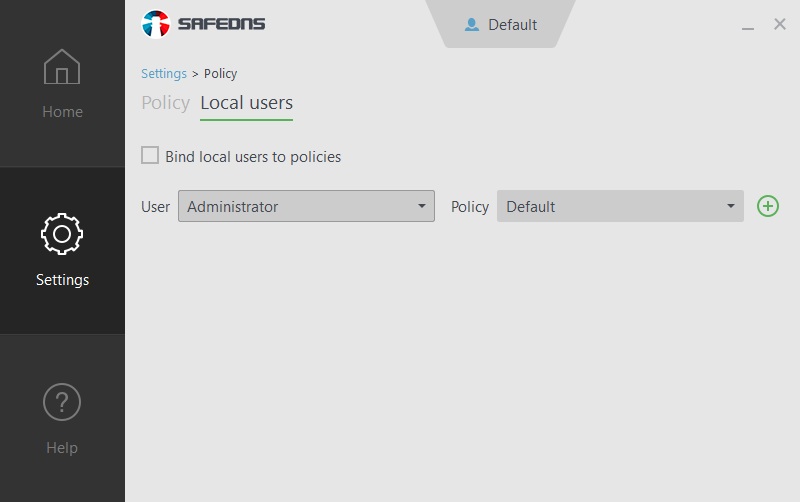
Binding Local Users to the Filtering Policies
If you have several filtering policies, you can bind local users on your PC to these policies. The selected policy will be applied to the selected Windows user after they log into the system.
To bind a user to a filtering policy, go to the Local users tab in the Policy section. Check the Bind local users to policies box to activate binding.
Choose the necessary Windows user in the User dropdown menu. Then select the preferred policy from the Policy dropdown menu and press the Plus icon.
To unbind a Windows user from a policy, press the Cross icon near the user’s name.
To turn off local users’ binding, uncheck the Bind local users to policies box.
Filtering Schedule
Additional policies can be used for a filtering Schedule. It allows you to apply different settings or limit web access at certain time periods in a single day. Schedule configuration is available in the Dashboard on the SafeDNS website only. Learn how to set up a filtering schedule.
Password Protection
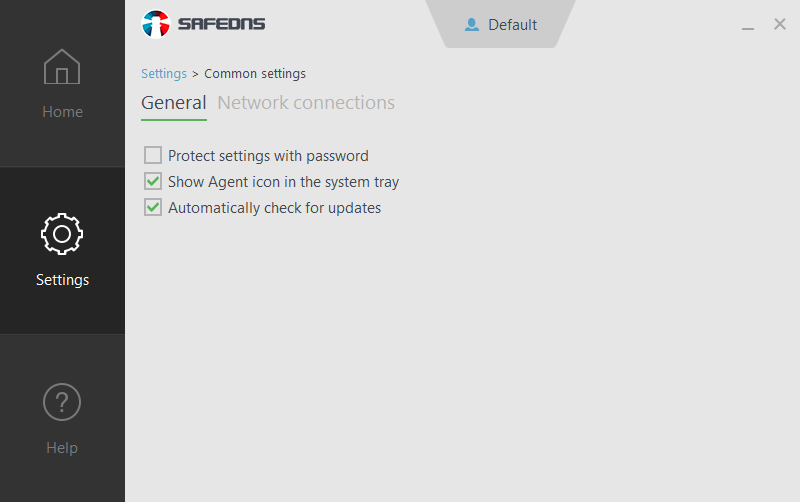
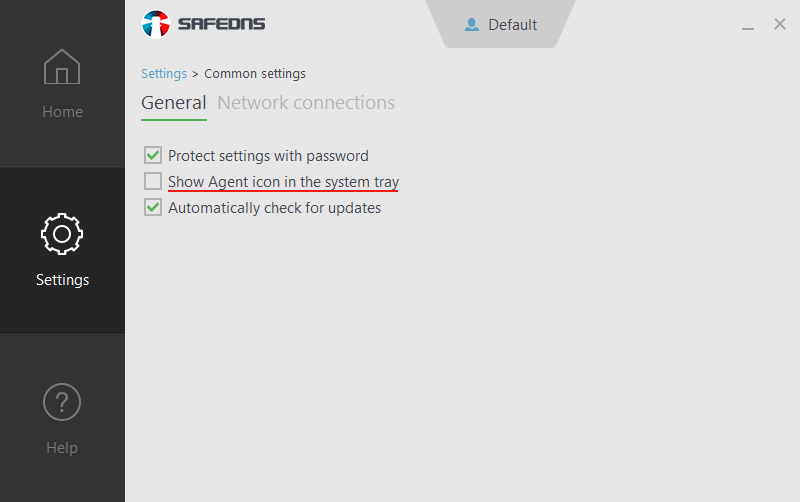
Actions such as changing settings, Agent uninstall, filtering suspension, and policy changing, are by default protected by your password.
Password protection can be deactivated in Settings > Common settings. To turn off password protection, uncheck Protect settings with password box. We recommend it only if you're the sole user of your computer. You can also manage additional settings, such as Show Agent icon in the system tray, and Automatically check for updates.
Agent's Tray Icon Options
You can use Agent’s tray icon to stop filtering or change the active policy.
Right-click on it and choose the necessary action.
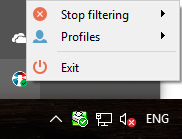
You can temporarily switch the filtering off for 10 minutes, 30 minutes, 1 hour, and until start or reboot.
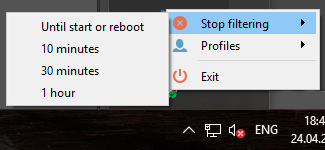
You can also change the active filtering policy from the tray icon.
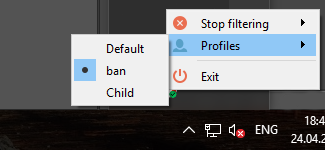
If your settings are password-protected, you will be asked to enter the password.
To hide Agent's icon in the system tray uncheck the Show Agent icon in the system tray box in Settings > Common settings.
If You Have Issues
If you have issues with the SafeDNS service or the Agent, feel free to contact our technical support. You can find our contacts on the Help page in the Agent. The Get support button will redirect you to the support form on the SafeDNS website. The Check for updates button allows you to automatically download the most recent version of the SafeDNS Agent.
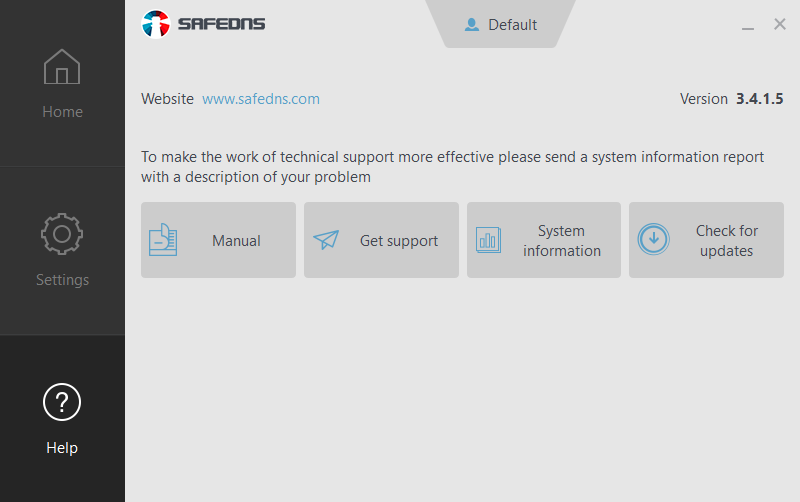
If SafeDNS Support asks you to send a system report, you can get it in the Agent. To get the report click the System information button on the Help page. This operation can take a few minutes. After that, copy the report and send it to the Support team via the feedback form.
!Please note that settings take 5-7 minutes to apply.
!Stats and filtering status update hourly.
Take advantage of the SafeDNS trial period and try all the best features