Mikrotik Router Setup Guide

The first step is the same for both Static and Dynamic IP address configurations: change your router’s DNS servers to SafeDNS addresses - 195.46.39.39 and 195.46.39.40
To do that, open the configuration page of the Mikrotik router, and navigate to Menu > IP >DHCP Server > Networks.
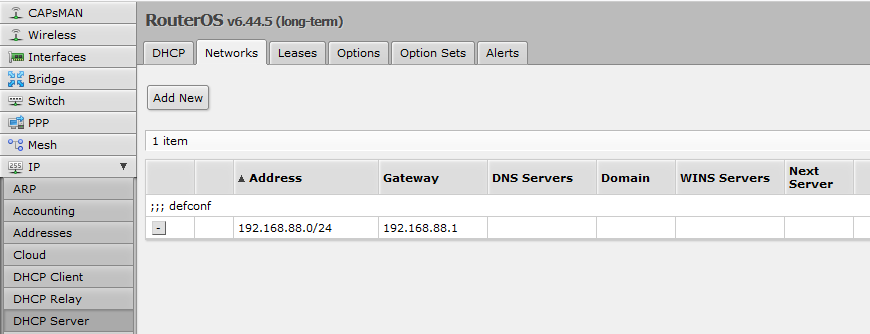
Select the network used by the DHCP server and change/add the SafeDNS addresses - 195.46.39.39 and 195.46.39.40.

Router with Static IP address configuration
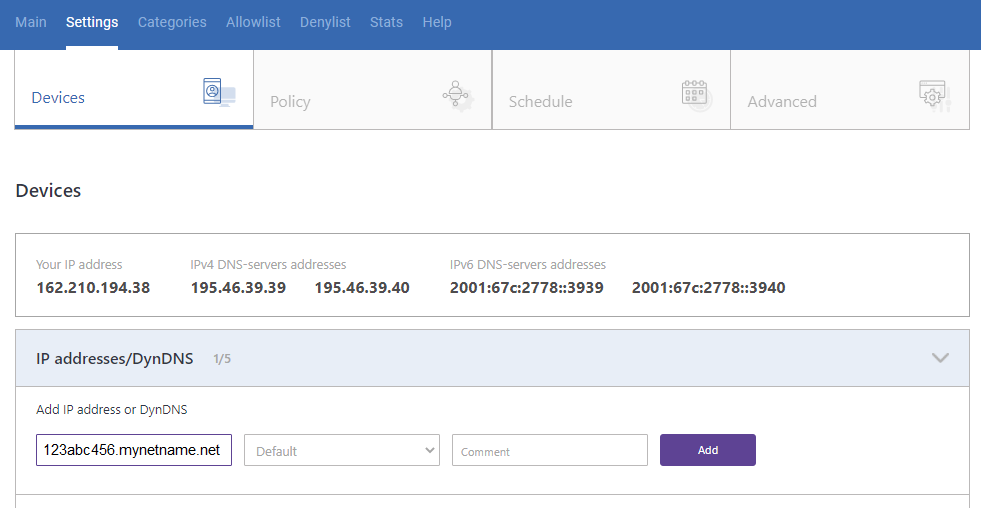
Go to SafeDNS Dashboard > Settings > Devices and copy your IP address to the "IP addresses / DynDNS" box, choose a policy, and click "Add".

You have successfully configured your router.
!Please note that settings take 5-7 minutes to apply.
!Stats and filtering status update hourly.
Router with Dynamic IP address configuration
Mikrotik routers have the embeded Dynamic DNS feature called VPN Access.
Navigate to Main page > Quick Set menu, and scroll down to the VPN setup.

Activate the VPN Access feature and set the VPN Password. Click the button "Apply Configuration" to save and activate the settings. Copy VPN address to clipboard.
Go to SafeDNS Dashboard > Settings > Devices and copy your DynDNS hostname to the "IP addresses / DynDNS" box, choose a policy, and click "Add".
Once added, you will see it in the DynDNS section of the Dashboard.

You have successfully configured your router.
!Please note that settings take 5-7 minutes to apply.
!Stats and filtering status update hourly.
Take advantage of the SafeDNS trial period and try all the best features