DNS-over-TLS Setup Guide

The goal of the DNS-over-TLS protocol is to increase user privacy and security by preventing eavesdropping and manipulation of DNS data via man-in-the-middle attacks. With DoT, the content and response of the DNS query are encrypted.
Using this feature the SafeDNS service can identify users by their public IP address only. This feature does not work with the SafeDNS Agent or the SafeDNS VPN solution.
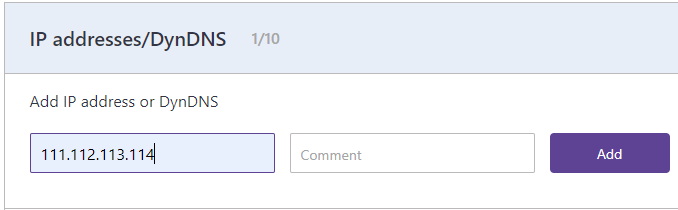
Before you start, please open your SafeDNS Dashboard > Settings > Devices. Enter your public IP address in the "Enter an IP address or DynDNS" field and click the "Add" button.
Windows 10
1. Download and install a Stubby .msi package.
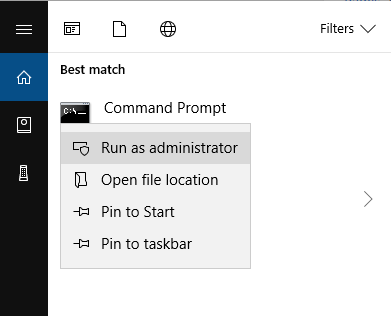
2. Run the Windows Command Prompt as administrator:
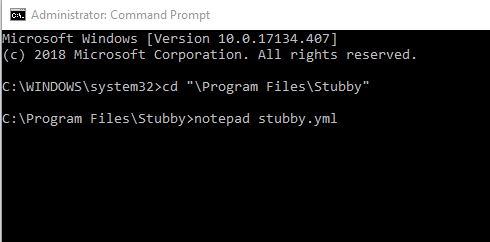
3. Go to the Stubby directory using the Command Prompt and open stubby.yml configuration file with Notepad:
4. Set settings following the example below:
resolution_type: GETDNS_RESOLUTION_STUB
dns_transport_list: GETDNS_TRANSPORT_TLS
tls_authentication: GETDNS_AUTHENTICATION_NONE tls_query_padding_blocksize: 128
edns_client_subnet_private: 0
idle_timeout: 100000
listen_addresses: - 127.0.0.1@53
round_robin_upstreams: 1
upstream_recursive_servers:
- address_data: 195.46.39.41
tls_auth_name: "dns-s.safedns.com" tls_pubkey_pinset:
- digest: "sha256"
value: kbv1ODr8gP7FV9/h2lp5t3sP4TdYZEwqUYj0mk0IBzg=
5. Run the following command to replace the default DNS server with a local Stubby:
PowerShell -ExecutionPolicy bypass -file "C:\Program Files\Stubby\stubby_setdns_windows.ps1"
6. Run the stubby.bat file
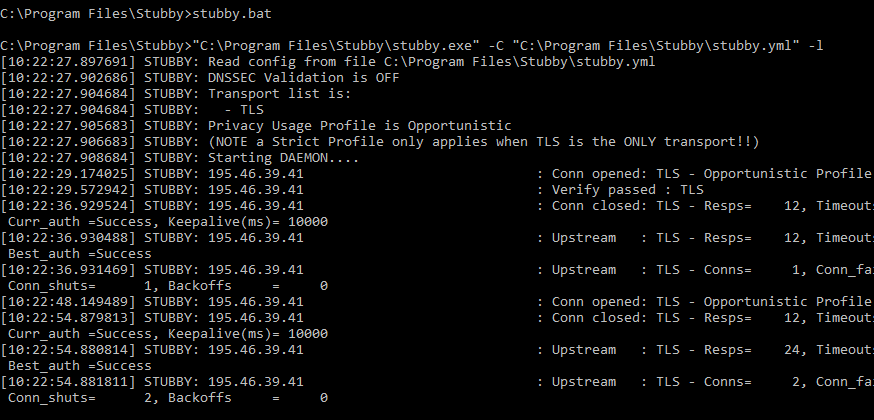
7. Check the filtering.
Linux (Ubuntu)
1. Install the Stubby package from a repository:
$ sudo apt install stubby
2. Set the configuration file /etc/stubby/stubby.yml as follows:
resolution_type: GETDNS_RESOLUTION_STUB
dns_transport_list: - GETDNS_TRANSPORT_TLS
tls_authentication: GETDNS_AUTHENTICATION_NONE
tls_query_padding_blocksize: 128
edns_client_subnet_private : 0
idle_timeout: 100000
listen_addresses: - 127.0.0.2@53
round_robin_upstreams: 1
upstream_recursive_servers:
- address_data: 195.46.39.41
tls_auth_name: "dns-s.safedns.com" tls_pubkey_pinset:
- digest: "sha256"
value: kbv1ODr8gP7FV9/h2lp5t3sP4TdYZEwqUYj0mk0IBzg=
3. Change DNS in /etc/resolv.conf file to 127.0.0.2:
nameserver 127.0.0.2
4. Start the filtering service
service stubby start
5. Check the filtering.
MacOS
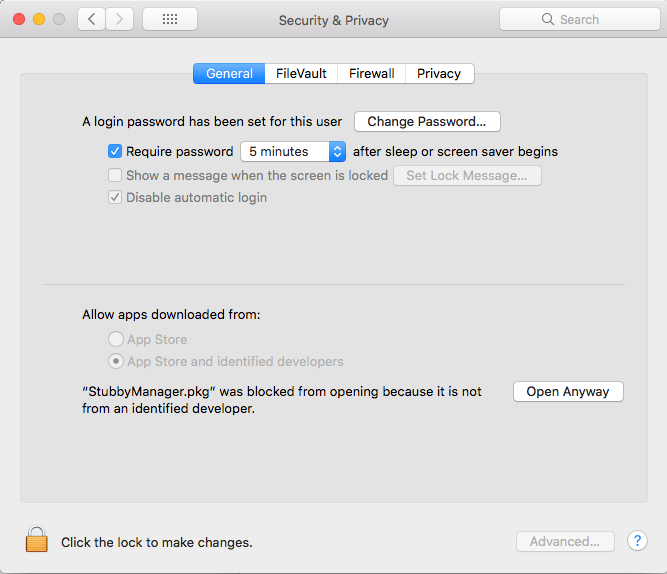
1. Download and install the Stubby Manager package.
If you get a security alert, click on "Open Anyway" in the security settings.
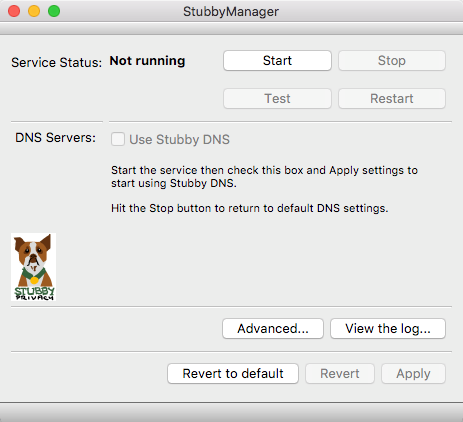
2. Launch a Stubby Manager app after installation and click the "Advanced" button.
3. Set the configuration file as follows:
resolution_type: GETDNS_RESOLUTION_STUB
dns_transport_list: - GETDNS_TRANSPORT_TLS
tls_authentication: GETDNS_AUTHENTICATION_NONE
tls_query_padding_blocksize: 128
edns_client_subnet_private : 0
idle_timeout: 100000
listen_addresses: - 127.0.0.1@53
round_robin_upstreams: 1
upstream_recursive_servers:
- address_data: 195.46.39.41
tls_auth_name: "dns-s.safedns.com" tls_pubkey_pinset:
- digest: "sha256"
value: kbv1ODr8gP7FV9/h2lp5t3sP4TdYZEwqUYj0mk0IBzg=
4. Apply the settings and click "Start".
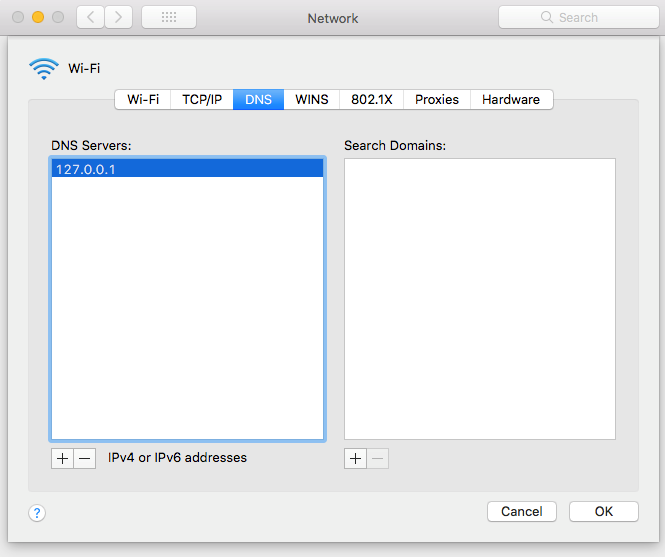
5. Open "Network Properties" and set 127.0.0.1 as the DNS server.
6. Check the filtering.
Take advantage of the SafeDNS trial period and try all the best features