DD Client Setup Guide

This guide explains how to install ddclient software in the case when you have a Dynamic IP address and your router does not have a Dynamic DNS feature.
Before you start
Redirect your DNS requests to our DNS server as described in:
- Windows 7 DNS setup guide (Steps 1-6).
- Windows 10 DNS setup guide (Steps 1-6).
Install and configure ddclient software
- Install ddclient (download link).
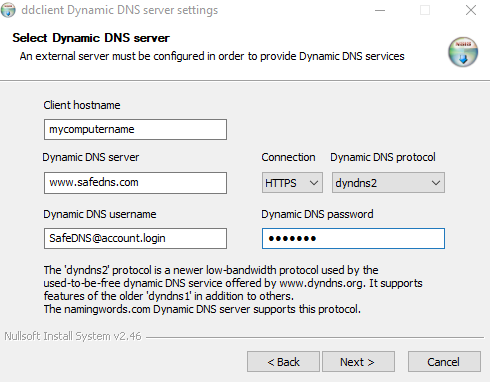
- Click "Next" until your reach the "Select Dynamic DNS server" window (see screenshot above).
- Enter any preferred name in the "Client hostname" field.
- Enter www.safedns.com in the "Dynamic DNS server".
- Select HTTPS in the "Connection".
- Select dyndns2 in the "Dynamic DNS protocol".
- Enter your SafeDNS account login in the "Dynamic DNS username".
- Enter your SafeDNS password in the "Dynamic DNS password".
- Continue clicking "Next" until the setup process is finished.
After the installation
Check if the IP address is successfully bound to service in the ddclient.log file. There should be a line like this:
SUCCESS: updating mycomputername: good: IP address set to 18.26.28.10
On Windows 10 you can find the log file here:
- C:\Windows\ServiceProfiles\NetworkService\AppData\Local\ddclient.log
On Windows 7:
- C:\windows\ServiceProfiles\NetworkService\AppData\Local\ddclient.log
- C:\windows\ServiceProfiles\LocalService\AppData\Local\ddclient.log
- C:\Users\username\AppData\Local\ddclient.log
On Windows XP:
- C:\Documents and Settings\LocalService\Local Settings\Application Data\ddclient.log
- C:\Documents and Settings\NetworkService\Local Settings\Application Data\ddclient.log
- C:\Documents and Settings\username\Local Settings\Application Data\ddclient.log
If the log file is correct, the DD Client table in Dashboard > Settings > Devices (link) will be updated automatically.
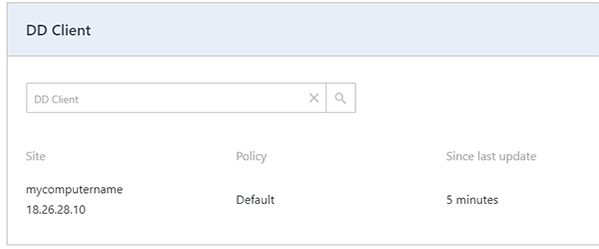
!Please note that settings take 5-7 minutes to apply.
!Stats and filtering status update hourly.
Take advantage of the SafeDNS trial period and try all the best features