Block Page Setup Guide

The block page is displayed when a user is trying to access a website blocked by the filtering rules. SafeDNS provides instruments to customize the block page. For example, you can add your logo and contact details on the block page, and an explanation why the website site is blocked.
Creating custom block page
To create a custom block page, do the following:
1. Log in to SafeDNS Dashboard.
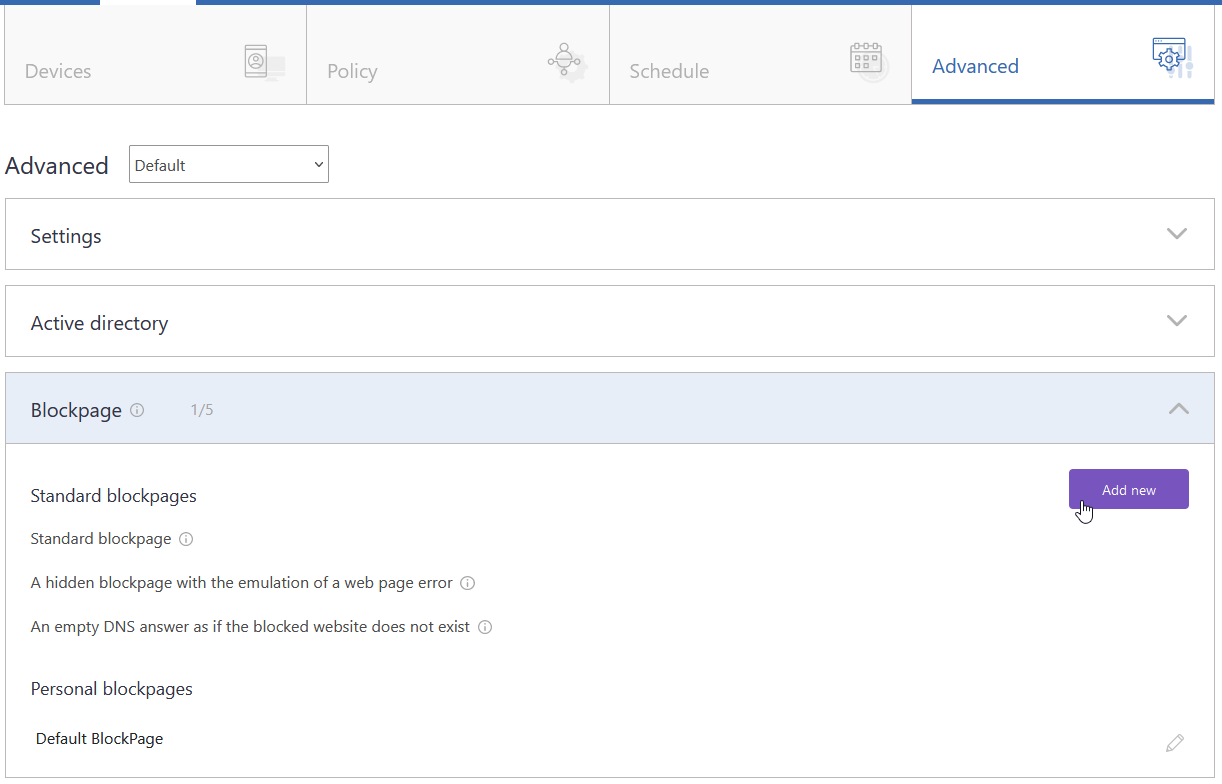
2. Navigate to Settings > Advanced and scroll down to the block page section.
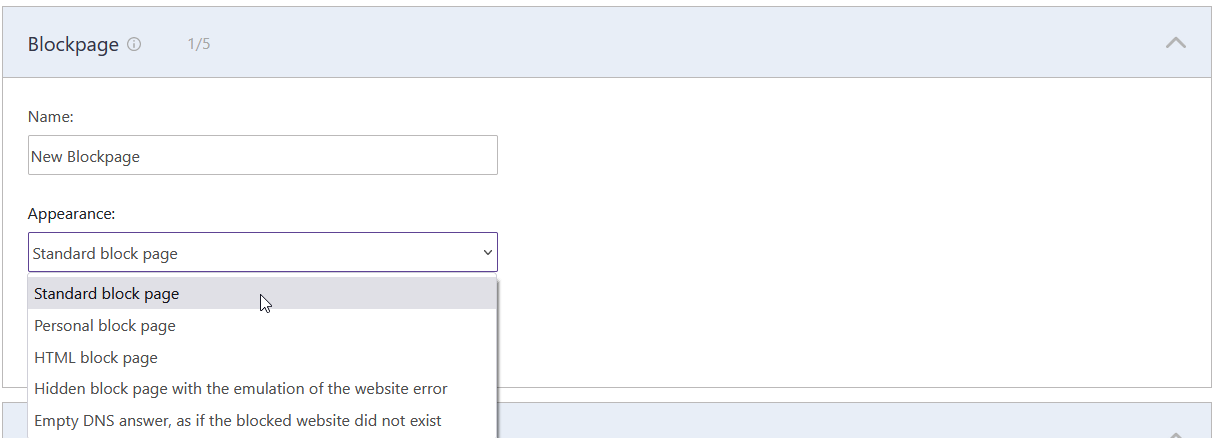
3. Click "Add new".
4. Enter the name of the new block page and choose its type from the dropdown menu. Click "Add".
Block page types
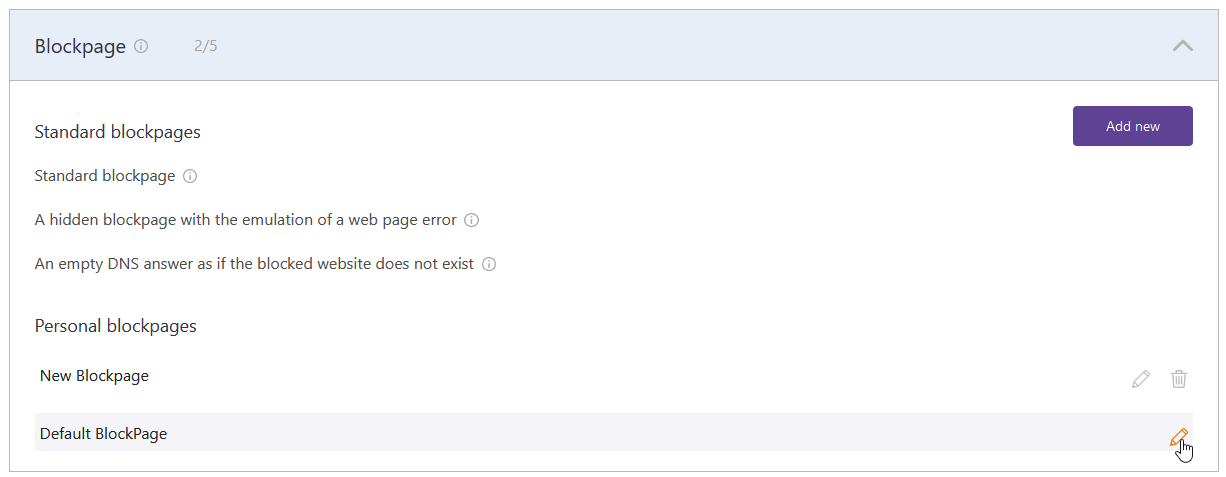
- Standard block page - default SafeDNS block page.
- Personal block page - simple block page with the customizable image and description.
- HTML block page - block page with the HTML support.
The following variables are supported: - $website - shows the address of a blocked website.
- $domain - shows the domain part of the $website.
- $reason - shows the reason of the block, supports language prefix.
- $category - shows the filtering category(-ies) of the blocked $domain, supports language prefix.
You can add a language prefix to translate the $reason and $category variables (e.g $fr:reason, $ar:category).
List of available languages: sq (Albanian), ar (Arabic), es (Spanish), sv (Swedish), tr (Turkish), it (Italian), en (English), ur (Urdu), pt_BR (Brazilian Portuguese), fr (French), de (German).
- Hidden block page with the emulation of the website error - block page that imitates browser's website error.
- Empty DNS answer, as if the blocked website does not exist - block page that imitates NXDOMAIN browser error.
The availability of a certain block page type depends on your billing plan.
You can always edit the block page type by clicking on the pencil icon to the right.
Applying custom block page
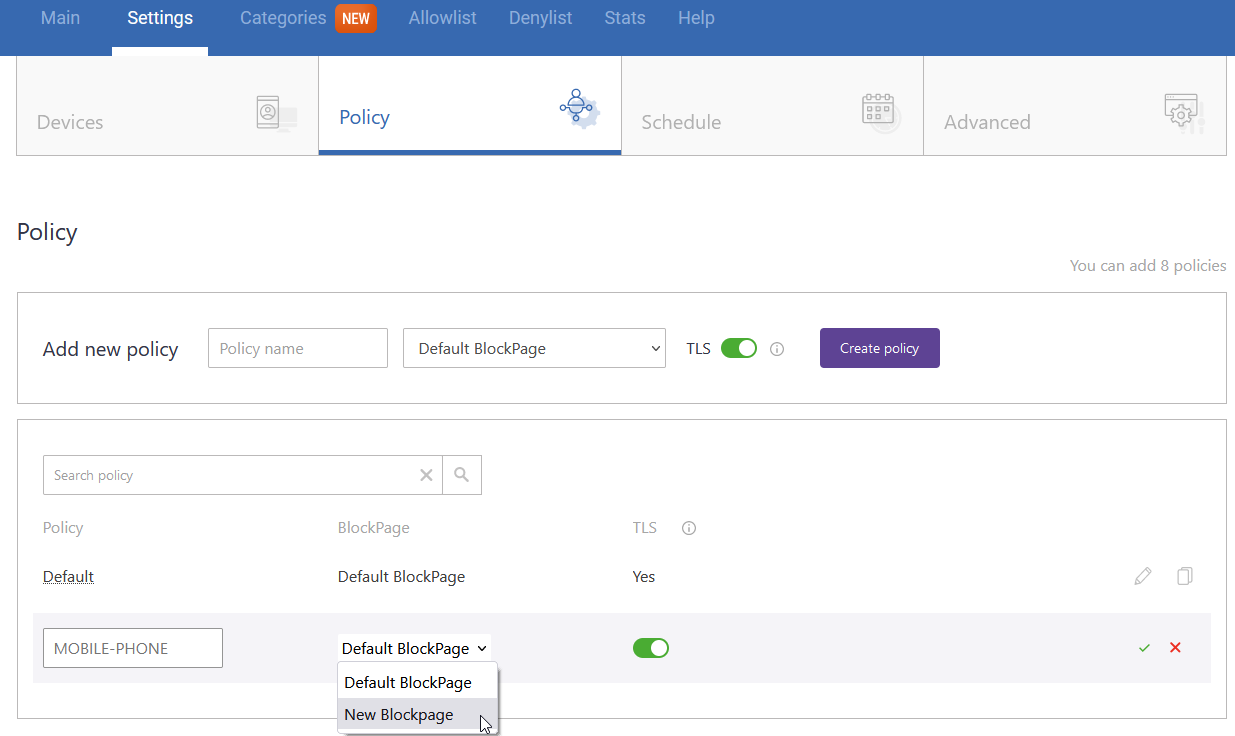
To create a custom block page, do the following:
1. Navigate to Settings > Policy.
2. Click on the pencil icon to the right from the filtering policy.
3. Select the custom block page from the dropdown menu.
4. Click on the green check mark to save the changes.
Please note that the SafeDNS TLS certificate should be installed on each end device where you want HTTPS pages to display correctly. Without the certificate, block page will be displayed for HTTP websites only.
SafeDNS Root CA certificate installation guide: https://blog.safedns.com/safedns-root-certificate-for-https-pages/
Take advantage of the SafeDNS trial period and try all the best features